Drone CI와 Bitbucket 연동하기
Docker 기반의 경량 CI 플랫폼인 Drone CI를 Bitbucket과 연동하여 파이프라인을 구성하는 방법을 알아봅니다.
Drone CI는 Docker를 기반으로 Harness에서 개발한 오픈 소스 CI 플랫폼입니다. 모든 구성 요소는 Docker 컨테이너로 되어 있으며 파이프라인 단계 실행도 Docker 컨테이너로 수행돼요. Go lang으로 작성되어 매우 가볍고 설정 파일도 간단한 YAML 파일로 구성할 수 있습니다.
Drone 아키텍처
Drone Server는 저장소에서 변경 사항을 모니터링하고, 구성 파일(.drone.yml)에 따라 Drone Runner에 task를 추가합니다.
Drone Runner는 Drone Server에서 task들을 polling하고 지정된 pipeline을 실행합니다.
Bitbucket 연동 설정
연동을 위해 Bitbucket OAuth Key와 Secret이 필요해요.
BitBucket Workspace Settings 접속
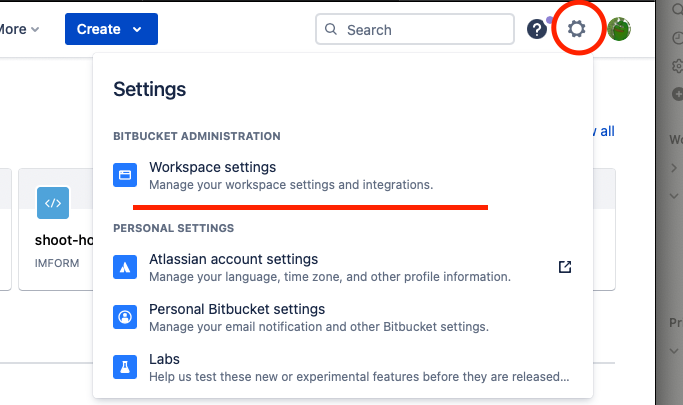 Bitbucket Workspace Settings
OAuth Consumer 생성
OAuth Consumer → Add Consumer 클릭 후 정보를 입력해요.
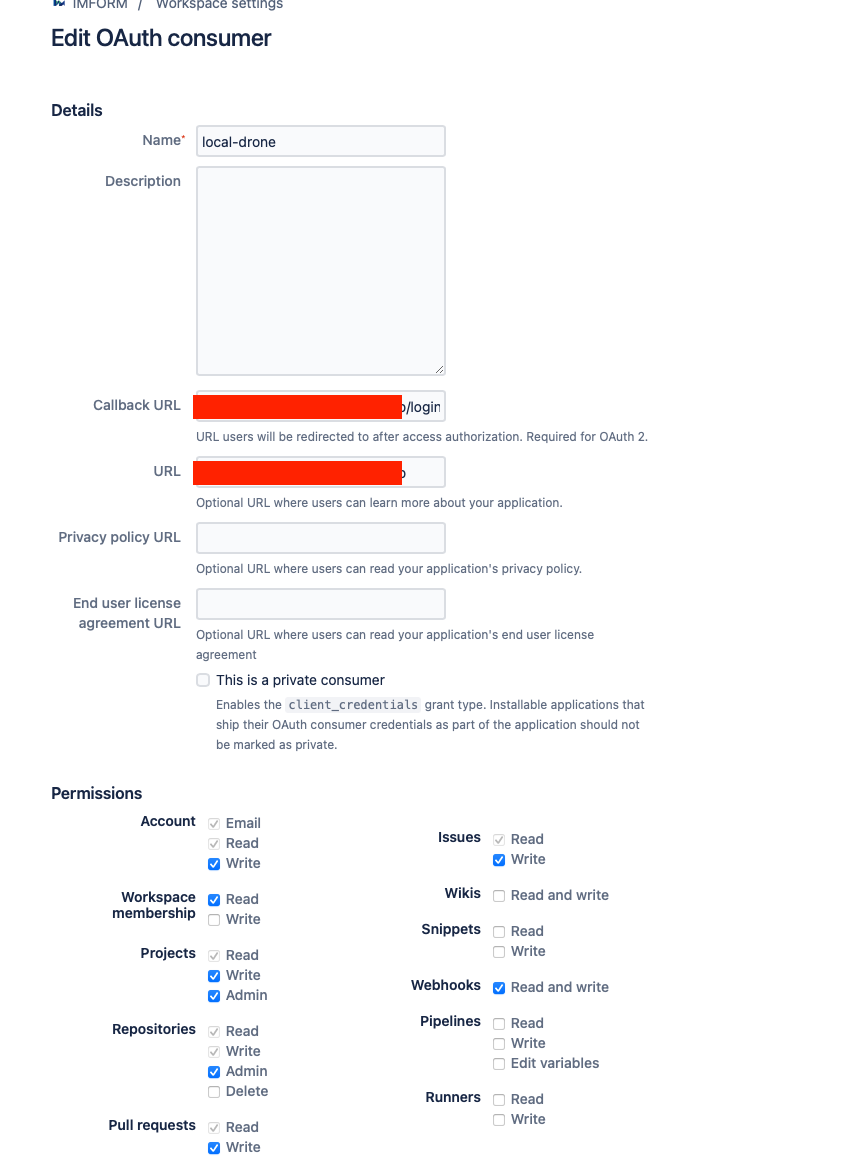 OAuth Consumer 설정
- Callback URL: Drone Server의
{URL}/login - URL: Drone Server의 URL
 생성된 OAuth Key와 Secret
Drone CI 설치
docker-compose.yml
1
2
3
4
5
6
7
8
9
10
11
12
13
14
15
16
17
18
19
20
21
22
23
24
25
26
27
28
29
30
31
32
33
34
version: '3.1'

services:
  server:
    image: drone/drone:latest
    container_name: drone
    volumes:
      - /var/lib/drone:/data
    environment:
      - DRONE_BITBUCKET_SERVER=https://bitbucket.org
      - DRONE_BITBUCKET_CLIENT_ID={CLIENT_ID}
      - DRONE_BITBUCKET_CLIENT_SECRET={SECRET}
      - DRONE_RPC_SECRET={openssl rand -hex 16}
      - DRONE_SERVER_HOST={DRONE_SERVER_HOST}
      - DRONE_SERVER_PROTO={DRONE_SERVER_PROTO}
    ports:
      - '12080:80'
      - '12443:443'
    restart: always

  runner:
    image: drone/drone-runner-docker:latest
    container_name: runner
    volumes:
      - /var/run/docker.sock:/var/run/docker.sock
    environment:
      - DRONE_RPC_PROTO={DRONE_SERVER_PROTO}
      - DRONE_RPC_HOST={DRONE_SERVER_HOST}
      - DRONE_RPC_SECRET={openssl rand -hex 16}
      - DRONE_RUNNER_CAPACITY=2
      - DRONE_RUNNER_NAME=runner
    ports:
      - '3000:3000'
    restart: always
Drone Server와 Drone Runner의
DRONE_RPC_SECRET은 같아야 합니다.
1
docker-compose -f docker-compose.yml up -d
Repository 활성화
브라우저에서 Drone Server에 접속하면 Bitbucket Repository가 연동된 것을 확인할 수 있습니다.
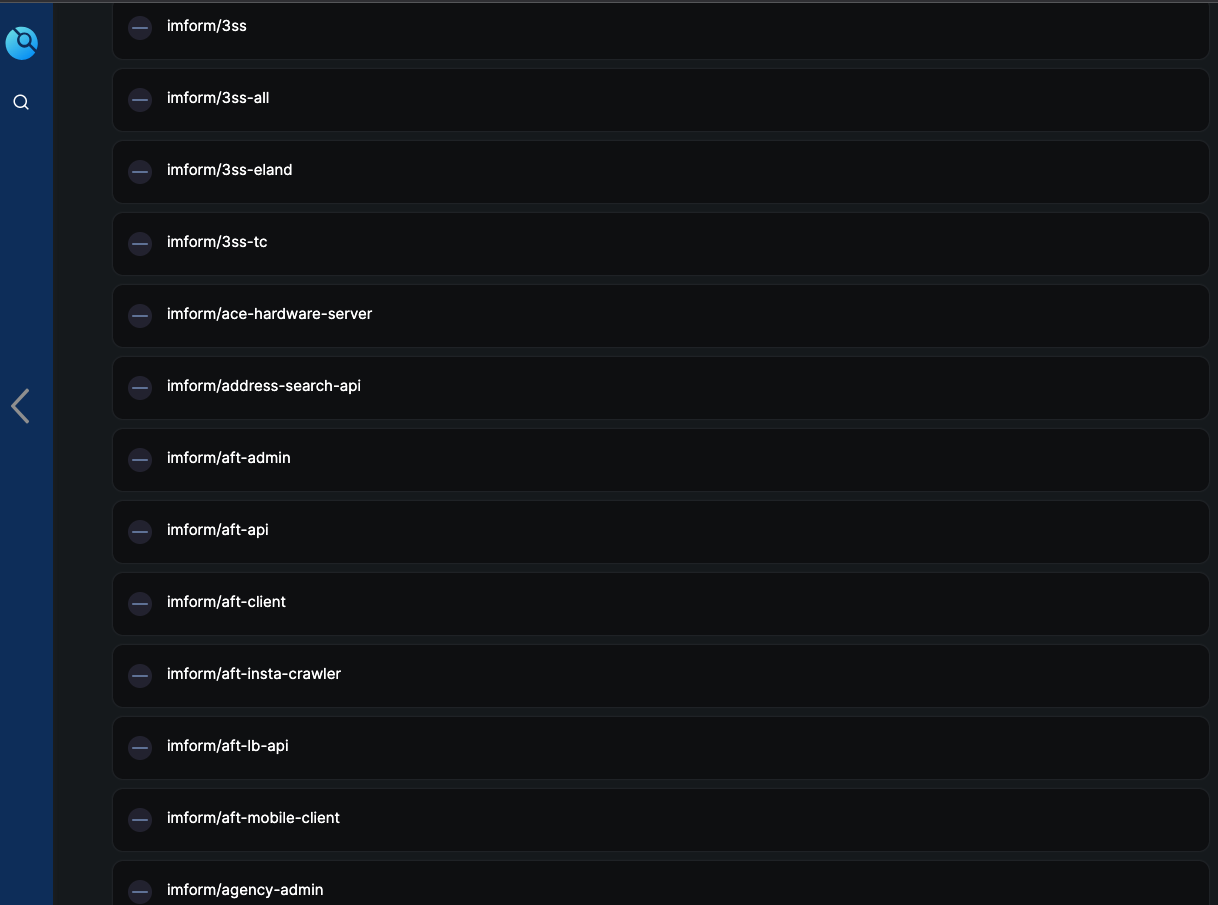 Drone에 연동된 Bitbucket Repository 목록
Repository를 활성화하면 자동으로 해당 Repository에 Drone Webhook이 등록됩니다.
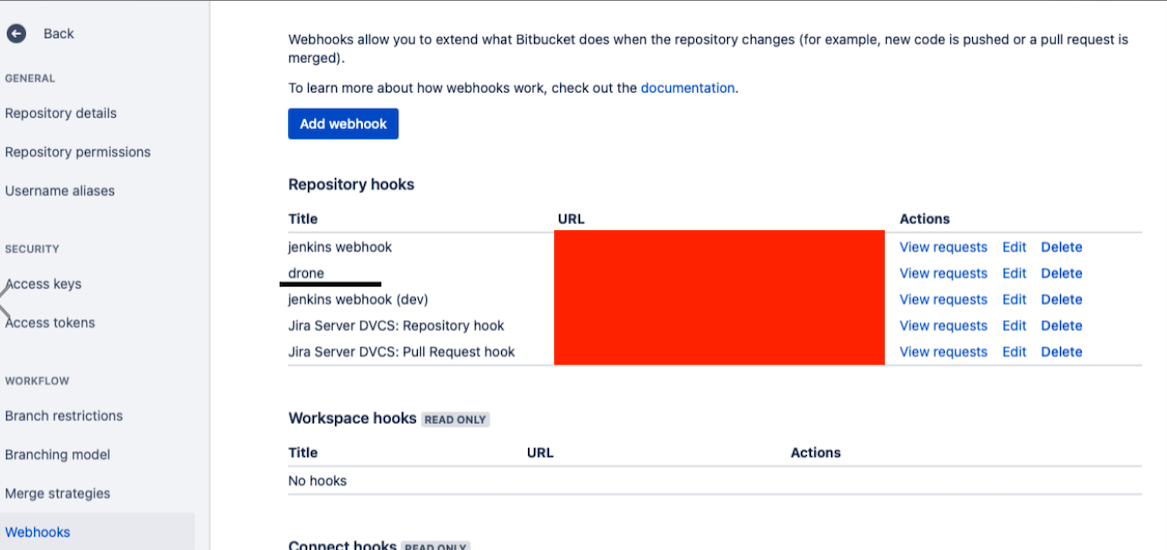 Bitbucket에 자동 등록된 Drone Webhook
파이프라인 작성
프로젝트의 root에 .drone.yml 파일을 생성합니다.
1
2
3
4
5
6
7
8
9
10
11
12
13
14
15
---
kind: pipeline
type: docker
name: deployments

steps:
  - name: step1
    image: alpine
    commands:
      - echo "Hello World"

  - name: step2
    image: alpine
    commands:
      - echo "Hello World2"
코드를 푸시하면 파이프라인이 실행돼요.
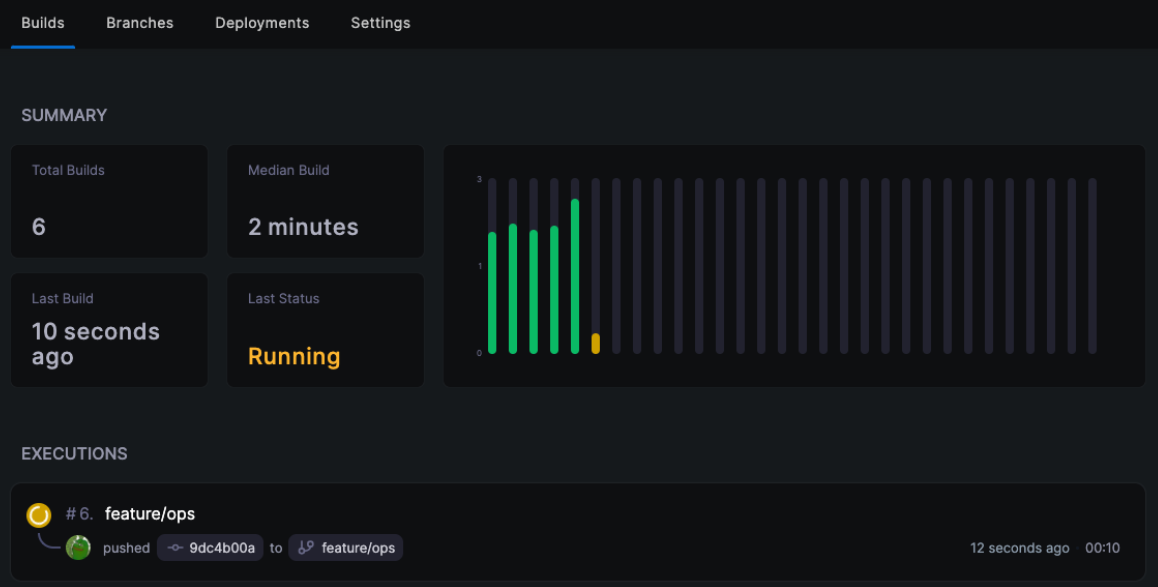 파이프라인 실행 목록
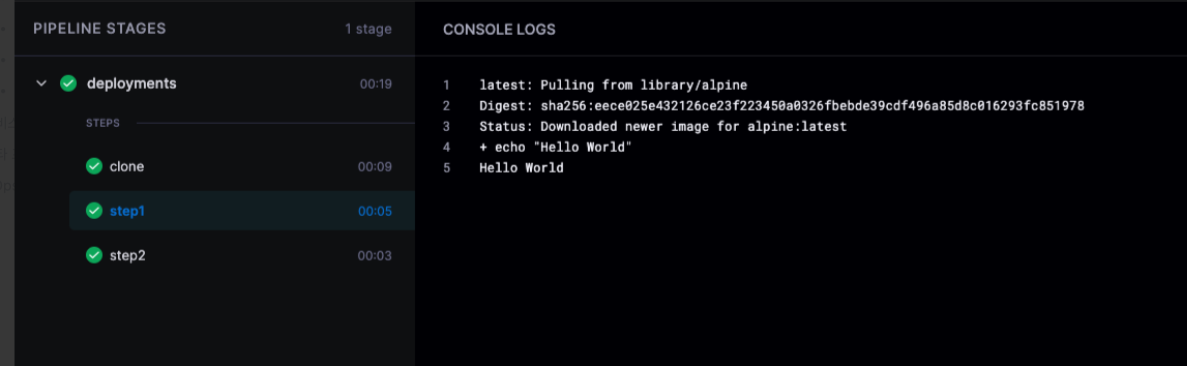 파이프라인 실행 상세 로그
정리
연동 절차:
- Bitbucket OAuth Consumer 생성
- Docker Compose로 Server와 Runner 배포
- Repository 활성화 (Webhook 자동 등록)
.drone.yml작성 후 푸시
참고 자료: